
Installing a biogas unit at home can significantly reduce your household’s carbon footprint, lower energy costs, and promote sustainable living. This step-by-step guide will walk you through the process of setting up a biogas unit, from selecting the right system to maintaining it for optimal performance.
Step 1: Assess Your Needs and Resources
1.1 Determine Energy Requirements:
Assess the energy needs of your household. Estimate the amount of biogas you will need for cooking, heating, or electricity generation. This will help you choose the appropriate size of the biogas unit.
1.2 Evaluate Available Space:
Identify a suitable location for the biogas unit. It should be close to the source of organic waste (kitchen, garden, or livestock area) and have adequate space for the digester and storage tanks. Ensure the site has proper ventilation and is away from living areas to avoid any potential odor issues.
1.3 Identify Feedstock:
Determine the type and amount of organic waste available for biogas production. Common feedstocks include kitchen scraps, garden waste, manure, and agricultural residues. Consistent and sufficient supply of feedstock is crucial for continuous biogas production.
Step 2: Choose the Right Biogas System
2.1 Types of Biogas Units:
– Fixed Dome Digester: Suitable for larger households or communities with high organic waste output. It has a long lifespan but requires professional installation.
– Floating Drum Digester: Ideal for medium-sized households. It has a flexible design but requires regular maintenance.
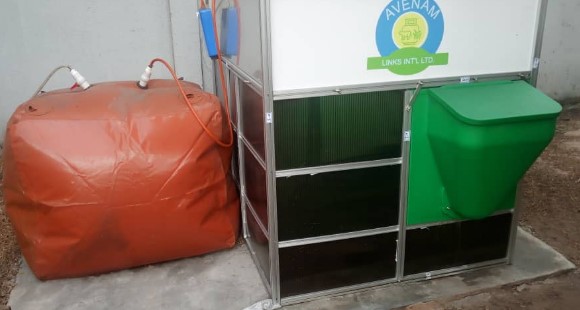
– Portable Biogas Digester: Best for small households or urban settings. It is easy to install and maintain but has a lower capacity.
2.2 Consideration Factors:
– Size and Capacity: Choose a unit that matches your household’s energy needs and available space.
– Cost: Compare the costs of different systems, including installation and maintenance.
– Ease of Use: Consider the ease of feeding the digester, removing digestate, and maintaining the system.

Step 3: Install the Biogas Unit
3.1 Prepare the Site:
Clear the chosen site of any debris and level the ground. Ensure there is a stable base for the digester to prevent any movement or tilting.
3.2 Assemble the Unit:
Follow the manufacturer’s instructions to assemble the biogas unit. This may include connecting the digester, gas storage tank, and pipelines. Ensure all connections are secure and airtight to prevent gas leakage.
3.3 Install Inlet and Outlet Pipes:
Install the inlet pipe for feeding organic waste into the digester and the outlet pipe for removing digestate. Ensure the pipes are properly sealed and positioned for easy access.
3.4 Set Up the Gas Storage:
Connect the digester to the gas storage tank or gas holder. Ensure the storage system is properly sealed and has a pressure relief valve for safety.
Step 4: Start-Up and Operation
4.1 Initial Feeding:
Start by adding a mixture of water and organic waste (such as cow dung or slurry) to the digester. This initial feed helps establish the microbial community needed for biogas production.
4.2 Monitor Gas Production:
It may take a few weeks for the digester to start producing biogas consistently. Monitor the gas production regularly and adjust the feedstock as needed. Such as the GASCHEK1000 portable biogas analyzer, use advanced photoelectric sensing principles to detect and analyze methane (CH4), oxygen (O2), carbon dioxide (CO2), hydrogen sulfide (H2S) and other gases, and accurately report , while effectively checking the digestive process.

Portable Biogas Analyzer GASCHEK1000
4.3 Regular Feeding:
Feed the digester with a consistent supply of organic waste. Avoid overloading the system, as this can disrupt the anaerobic digestion process.
Step 5: Maintenance and Troubleshooting
5.1 Check for Leaks:
Regularly inspect the biogas unit for any gas leaks. Use soapy water to check the connections and repair any leaks immediately.
5.2 Monitor pH Levels:
Maintain the pH level of the digester between 6.5 and 7.5. If the pH is too low (acidic), add some lime or baking soda to neutralize it.
5.3 Remove Digestate:
Periodically remove the digestate from the outlet pipe. Digestate is a valuable fertilizer, so use it in your garden or farm to enrich the soil.
5.4 Stirring the Digester:
Some biogas systems require regular stirring to ensure even distribution of feedstock and microbial activity. Follow the manufacturer’s recommendations for stirring frequency and method.
5.5 Winter Precautions:
In colder climates, take measures to keep the digester warm during winter months. Insulate the digester or install a heating system to maintain optimal temperatures for biogas production.
Installing a biogas unit at home is a practical and sustainable way to manage organic waste and generate renewable energy. By following this step-by-step guide, you can set up a biogas unit that meets your household’s energy needs while contributing to environmental sustainability.
